Making and Riding the Ultimate Wheel
Contents
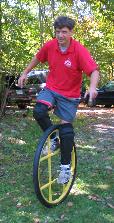
Riding an Ultimate Wheel
Why ride an ultimate wheel? Well its obscure, its fun, and only a
little more difficult than riding a unicycle.
Sem Abrahams recommends that you should first be able to idle a
unicycle with the seat out in front. I then learned to ride by
starting next to a wall with the pedals horizontal and heading off
to see how many revolutions I could make. I found I could stay up
by wobbling the wheel so that the wheel is leaning against the leg
that is not pushing down on the pedal (an exception is made later
when idling). If you do not do this, when you push down on the
pedal the tire will grab your leg and it will act as a brake. Care
should be taken that you do not try to stay on too long when it
becomes unstable, just jump off. It seems possible that you could
do damage to your ankles if you stay on while the wheel is falling
over. Make sure when you ride you put on some ski socks or some leg
armor and an old pair of pants or you will be sorry.
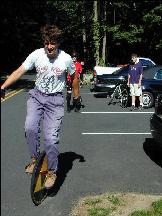
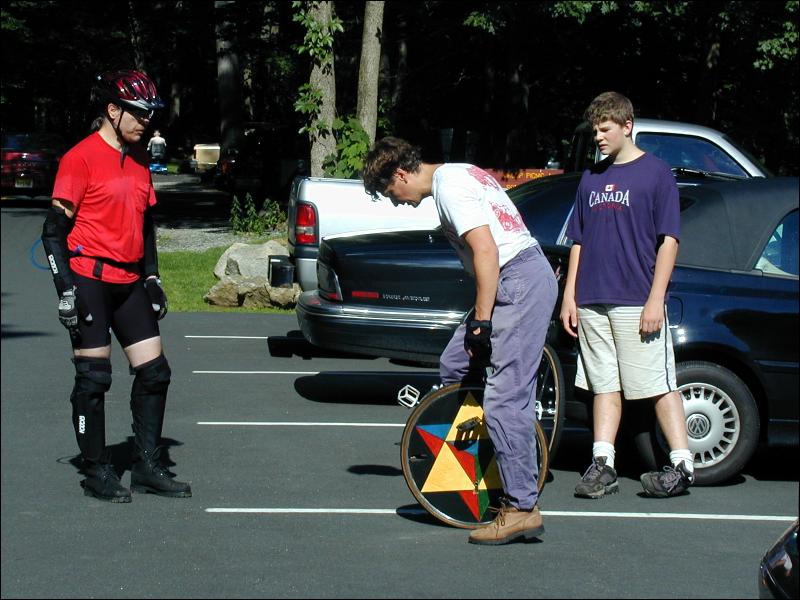
 Hands off mount. (With Scott the Muniac and James Muehlner looking
on.)
Hands off mount. (With Scott the Muniac and James Muehlner looking
on.)
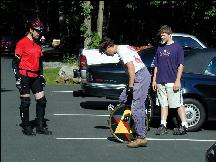
 On
the road (Scott's Aluminum Muni and my thick spoke UW leaning
against car)
On
the road (Scott's Aluminum Muni and my thick spoke UW leaning
against car)
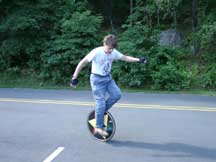
 Very mild off road terrain.
Photos thanks to Scott the Muniac and
Dirk Muehlner on 5 August 2000.
Building an Ultimate Wheel
I followed Tom Miller's
instructions on building an Ultimate Wheel for the most part.
(Another approach is to embed cranks in the wooden wheel. I
personally think making an ultimate wheel with Tom's Ultimate Wheel
Insert is a lot more durable, though this may be the way to go if
you do not like the 4.5" or 5.5" "crank" size for Tom Miller's
insert (4.5" is a second "crank" size available only in Tom's
Deluxe Ultimate Wheel Insert)).
Some more tips on building an ultimate wheel:
When cutting the valve hole in the
plywood, make this big enough for the pump you are using. Consider
its orientation. Later, if you want to hop with it, you may want to
cut small holes in the plywood by the the rim so you can hop with
it holding the rim, with the pedals horizontal or vertical
positions and the valve will not be in the way. (Holes also make it
much easier to carry!)
I had a real tight fit for my rim so I put the rim on a carpet
in the basement, placed the plywood on top and hit the plywood a
few times with a sledge hammer to get the rim on, as I got close I
had to be delicate or it would come out the other side.
I used screws instead of nails and predrilled small holes and
made sure the heads of the screws produce no sharp edges. (Screws
are easier to take out if you want to make hand holds later.)
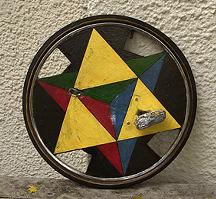
I filled in gaps between plywood and rim and plywood and insert
with wood filler, sanded again, then painted a design, then covered
with polyurethane to protect paint.
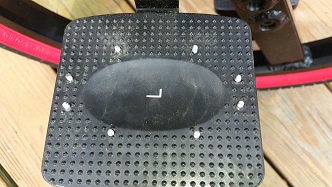
I used a wide metal platform mountain bike pedal. Wide because
all your weight is on it, bumpy for grip. I used duct tape on the
edge of the petals to cut down the vibration shock when it falls
over.
Thick Spoked Ultimate Wheels (Off the Shelf)
I have a 6 spoked 26 inch ultimate wheel from Semcycle (Sem Abrahams) (also
available 20" and 24") and found it no harder to ride. I replaced
the supplied pedal with a metal bumpy mountain bike pedal.
Initially, I found thick spoke wheels require more maintenance
since the screws can back out and puncture the tube from inside. I
found dipping the screws in wood glue and screwing them back in
will do the trick (the Ultimate Wheel has wood inserts in the
spokes). I also found the wheel squeaks and put narrow strips of
duct tape at the spoke ends (later had it welded (this was
relatively easy because its a steel rim, aluminum may be used
now)). The advantage of a thick spoked wheel of wheel is that they
are a bit lighter and easier to grab for hopping.
A 2 spoke 20" and a 4 spoke 24" are currently available from
unicycle.com. I do not like
the two spoke because I would be afraid of damaging it hopping with
the pedals level.
 Brian MacKenzie's 36"
Coker
Brian MacKenzie's 36"
Coker
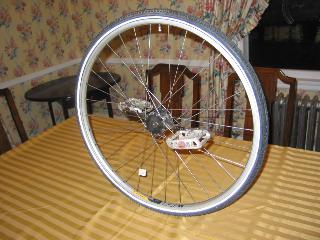
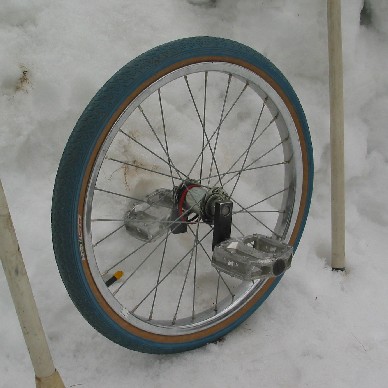
Spoked Ultamet Wheel Crank Hub w/ Spokes
I came up with the idea of putting cranks inside the spoke flange,
so I gave Tom Miller a call so he
could make it happen. He also had the idea but never made one. I
wanted a 700c wheel with 5.5 inch cotterless cranks. I think it
came out nicely. Give Tom Miller a call (USA (765) 452-2692) if you
want one... he already figured out how to do it and could make one
to your specifications. The rim here is an Alex Alex DM18 700c 32
hole and the cranks are Matthew's. Two spokes, one next to each
crank are irreplaceable... i.e. if they break there is not enough
clearance to put another one in. The same can probably be done with
a 36 hole rim as well, but it might be better to have 32 so your
foot has less chance of hitting the spokes closest to the cranks.
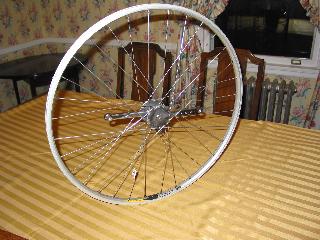 Ultamet wheel (tm) just out of box
 Ultamet wheel (tm)
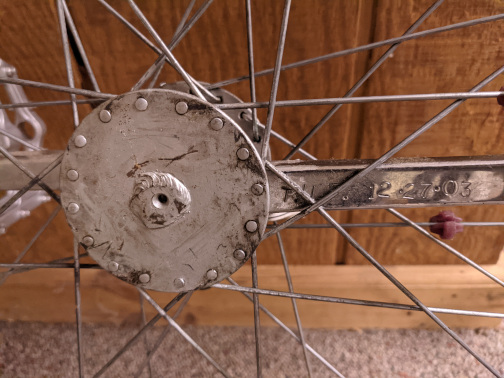
 Ultamet wheel (tm) TUF birth
mark
Ultamet wheel (tm) TUF birth
mark
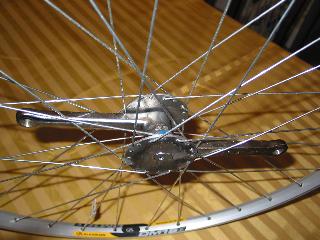
 Ultamet wheel (tm) side view
 Ultamet wheel (tm)
inside
Ultamet wheel (tm)
inside
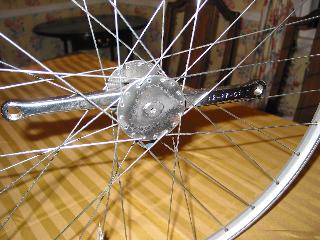
 Ultamet wheel (tm) balanced
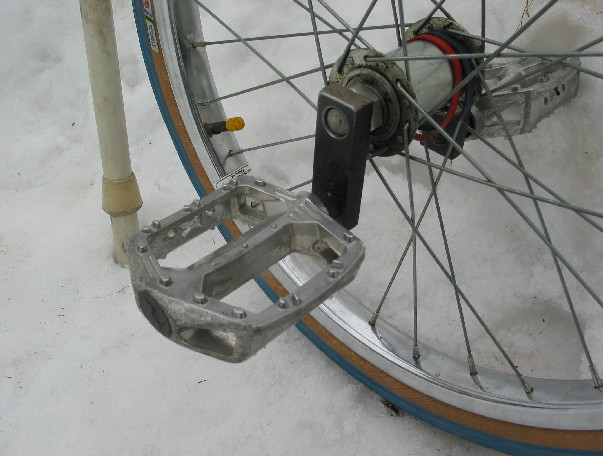
After riding a few times my ankle would sometimes hit the spokes so
I respoked so that all the spokes are inside the flange so he ankle
no longer hit these alternate protruding spokes. (Also now has new
pedals and new tire (inverted tread) with nylon webbing on tire).
It has a little wear now but holding up nicely.

 Here
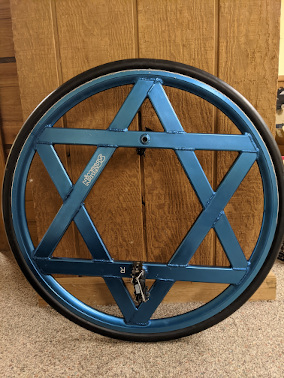
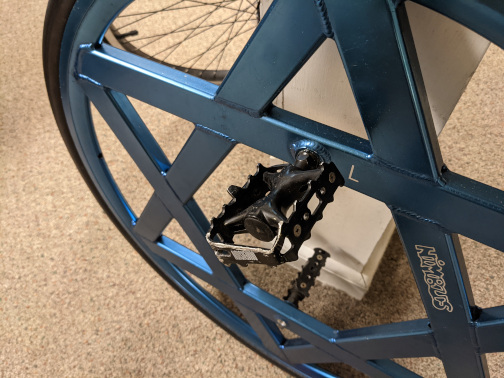
is a different idea.
Here
is a different idea.
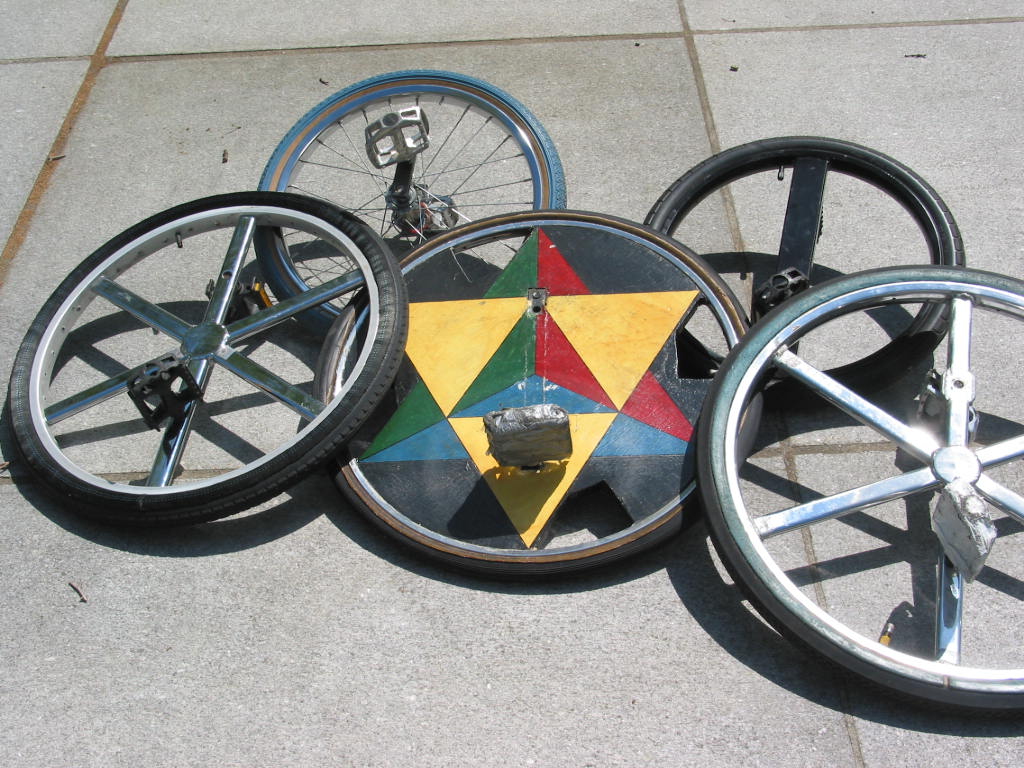
Tom Miller also experimented with the idea. Here are three UWs,
embedded cranks, UW insert, and an early spoked ultamet wheel
(failed experiment as the disk shifts). Another shot.
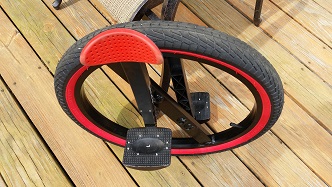
Nimbus 28" with solid rubber tire
This is a great idea for an ultimate wheel as the weight of the
wheel is in the tire which seems to help. Also a solid rubber
tire is very smooth so no tread to grab your legs. On mine though
I would prefer a smaller tire as the bigger tire has a bit of crown
where hits my leg. Many thanks to Marty Altschul for these ideas.
Riding Nimbus with Solid Rubber Tire
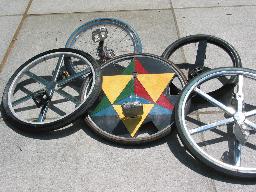
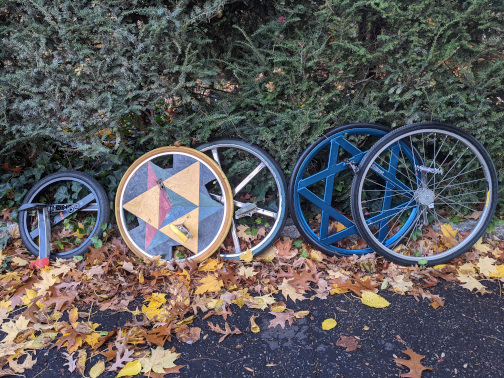
What Size Ultimate Wheel Should I Buy?
4 sizes commonly available: 20", 24", 26", and now 28".
All with 5" "cranks". I prefer the
26" for most tricks and long rides because it seems the stablest to
ride. The 20" seems to have a greater tendency to kick out, but
this adds to its appeal for me. The 24" is used in official
unicycle meets and the difference in "feel" is small between the
24" and 26". Kids with short legs may prefer the smaller UW. So I
recommend getting all three. (A 28" or 700c wheel, would be nice
and probably the best to standardize for races, IMHO.)
Picture shows 20" Lunicycle, 24" with insert, 26" Semcycle, Nimbus 28",
and Ultamet 28". I generally use simple leg armor now, (ski sock, ankle
protector and 2 layers of nylon pants).
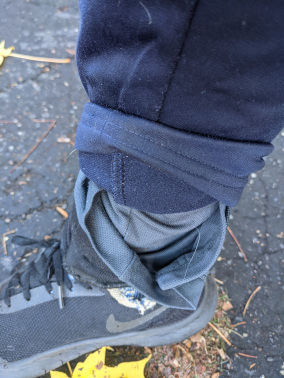
The Ultimate Wheel and Friction
I found, as most riders do, that the rubber on the tire grabs
your pants. Here are some attempts at dealing with it (any other
suggestions?):
Silicone spray on your pants or the
rubber tire. Kind of messy and helps marginally.
Use Semcycle's Monte Carlo tires
(only available on 26"). After the break in period the plastic
reflector band on tire wall does help. Problem: there is still some
rubber there to grab your leg.
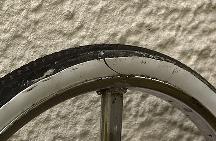
A smooth dry rotted tire is pretty
good since its hard surface will glide over your leg instead of
grabbing it. Problem: may be hard to find a "good" dry rotted tire.
(This is on the one I am riding above). Combined with Silicone
spray it is excellent. When the tire was worn out the tire wall
walls were saved and sewn on to a new tire.
 dry rot white wall with new
tire, UW now has hand hold holes
dry rot white wall with new
tire, UW now has hand hold holes
 close-up
Cover each side of the tire wall with
2" cellophane tape. Problem: This works until the tape wears out,
in about one day, less if you ride through gravel (the pebbles
stick). ;)
Cover the sides of the tires with
saturn rings out of vinyl flooring (very cheap), though not as
slippery, seems to hold up a bit longer. The 2 vinyl rings are
stretched on the rim on either side of the tire. Problem: After a
few week or 2 the flooring will be all ripped up.
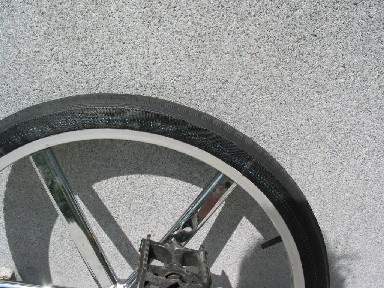
I have experimented with rings cut
from plastic sheets (polypropylene .060 gauge) and then bent with a
heat gun and adjustable pliers to wrap slightly around the tire.
One problem I had with this approach is the tire I was using was
loose and then would bulge out on one side (one of the problems of
the rings being slippery and less flexible). To resolve this, I
used a tighter fitting tire and sanded down a groove for the tire
to grab. I got the tire to hold 40 lbs. of air without serious
bulging. Normally, I would take it up to 60 but it did not look
like it was a good idea. Another problem recently discovered was
that if you go off even a tiny curb at an angle you can easily
break the brittle rings you worked so hard on.
 result of going off a 2 cm curb
The next plan was .030 teflon, its
more slippery and more flexible but set me back $60 for a standard
48" square sheet (not the best size if you want to make rings for a
24" and a 26" wheel). The problem here is it will rip because it
fans out and is soft.
I have tried polyurethane and nail
polish on the tire walls with moderate success. They wear out in
spots after a good ride or two but its easy to apply (i.e. you do
not have to take the wheel off) and cheap. Still, this does not
create as slippery a surface as I would like.
I even have sewn a soft nylon rope
(thickness about the width of my pinky) on the tire wall. This
creates a bit of a crowning surface, so leg armor is
required.
The best solution so far seems to be
to sew on Tubular Webbing. For the 26", I used 9/16" Teal
Climb-Spec Tubular Webbing (later versions I used 1" Black Webbing)
on the tire wall with upholstery thread. I also sewed on some 1"
Black Military-Spec Tubular Webbing on the Roach pads to keep them
from wearing holes. The Tubular Webbing is from
www.rei.com and
www.nrscatalog.com. The tire
(which I highly recommend) is
Avocet 26" x
1.5". Originally I used it without the webbing on the Roach pad
and it started to wear. Now I have the webbing on both; the wear is
minimal and the ride is as smooth as silk. (I found you have to be
careful with 661 pads and cover up the velcro or it with rip up the
webbing).
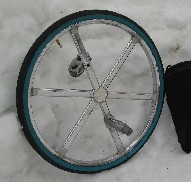 9/16" webbing sewn to white wall
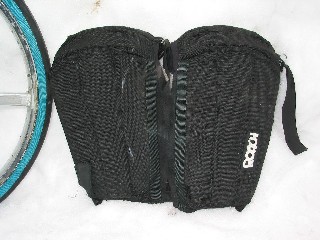 webbing sewn to white wall and
Roach pads
webbing sewn to white wall and
Roach pads 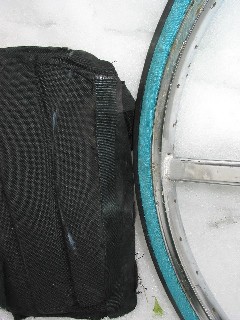 26" and roach pad
 24" with 1" webbing
  24" close-up
 20" with 1" webbing
  20" close up
Further Challenges with an Ultimate Wheel
There are many other skills related to unicycle skills.
(Personally I have not done the kickup mount
(seems on hard on my 26", probably easier on a 20" as you have more
leverage), jump from one to another (a less dramatic variation may
be to step from one to another), jump over pole, and the leap frog
mount). The roll mount I think is easier if you step on the pedal
just before its at the bottom most point. Some others are:
Pedals level mount: hold UW pedals
level, hold tire with opposite hand of leading pedal. Put foot on
back pedal, put other foot on front pedal and release UW with hand.
This is the first mount I learned, but is probably just as easy as
the freemount. (Backwards is kind of awkward but not hard.)
Backwards freemount: UW is behind
you, put foot on low pedal and other on high pedal.
Suicide mount: hold UW pedals level,
release UW and jump at the same time. Riskier on a unicycle. I
learned by pinning tire against the curb at first. Real easy if one
pedal is down, just jump on the low pedal.
Spin mount: put foot on low pedal, do
a 180 or more while swinging the other foot on. (I guess there is a
backwards version too.)
Swivelling: Turn the wheel to the
left side when pressing down with the right foot and then turn to
the right when pressing down with the left foot and keep it going.
The turns should approach 180 degrees, this is not hard but its
fun. This is probably good for learning to go up hills. Something
similar can be done so you move sideways. (Currently working on
getting this backwards (so far only 90 degree turns)).
Ride with knees hitting chest: Its a
workout. (I am currently working on doing this backwards.)
Idle with the pedals horizontal
(circus idle): I find it slightly easier if my knees are together.
Its fun. Once this is learned, going backwards is much easier. Then
work on doing this while hands behind back or juggling. After this
a further challenge is to do the twist... twist the ultimate wheel
while nearly at a still stand on a slippery surface but not ice
(slate or spacked snow).
Sitting down on the tire: Roll along
slowly, when the pedals are vertical grab the wheel with the
opposite hand of the leading pedal, stop, sit down briefly, and
then release the wheel with your hand as you stand up. Later, try
not to use your hand, then try from idle, sit, back to idle and
also circus idle, sit, back to circus idle. Its probably easier
than doing it on a unicycle holding the seat, as in the George Peck
video.
Taking a foot off the upper pedal for
a second or longer (during an idle): Kick up as high as you can.
This helps with other skills like the hands off hop and hopping one
footed with a hand on the wheel. (Try putting the foot on the other
side of the wheel... just thought of it now... I guess you can try
to put it in front or behind... try a crank idle too if its a
unicycle wheel ;) ). I have also been able to lift a foot and throw
a club under the leg while juggling. Here is a case where lifting
the foot while passing under the leg when juggling is a harder
trick.
Hop: Pedals horizontal with a hand on
wheel (hand under rim if wheel design permits). Once you have this
solid (say 25 hops) you can work on spinning around.
Hands off hop: From an idle with
pedals vertical, move upper foot under the pedal and then hop with
the other foot... after hopping get your foot back on top of the
pedal and ride off. Practice by taking a foot off and also try
hopping directly from a mount. Concentrate on keeping enough
pressure on the pedals, so your feet do not slide off. Try to get
25 and work on spinning around. Too easy?, then put your hands
behind your back.
Hopping one footed with hand on wheel
(pedals vertical): Slow down the idle, take your upper foot off,
grab the wheel (with the opposite hand as foot on the pedal), and
hop, then put your foot back on the pedal. Once you have this solid
(say 25 hops) you can work on spinning around. Watch out you don't
pull your UW apart if its the spoke variety. It may be easier
holding the UW on the same side as the foot on the pedal, but I
developed bruising on my arm from my knee hitting it.
Hopping pedals level with no hands
with legs pinching the wheel: This seems too hard to do especially
if the tirewall of the UW is slippery. An alternative is to hop
leaving the UW on the ground and remount (I am too afraid to do it
clearing the UW yet). Then work on hopping while rolling and then
hopping to another UW.
Riding with no leg contact with the
wheel: I find this skill difficult... When this happens, I
frequently feel like I "missed the beat" of the wheel and
dismount.
Idling with a foot on the tire: I got
nowhere with this yet, it seems like its possible though. A
variation, still very hard: idle one footed with a hand on the
wheel (possible?).
Walk the wheel: Move the wheel with
both feet on the tire. Is this possible? ;) Maybe it could be done
with a really thick donut tire?
Jump rope: after being able to do
hands off hops solid... its time to move to the jump rope, try to
get 25 times and then ride away. Also work on spinning the rope
backwards (personally only at 10 so far).
Pick up a (dropped) juggling ball (or
club): Its easy on a 20", on a 26" its a bit harder but doable.
Also can work on being able to touch the ground. I do this with a
pedal down. I find it a little easier to reach down with the
opposite hand as the down pedal.
Juggle clubs while idling: Later, try
juggling while mounting. (Also trying meteors or poi... it seems
more of a challenge than simple cascade juggling because you seem
to have less of your body to help you balance.)
Juggle clubs while doing hands off
hops: One probably needs to get the jump rope trick solid first.
Later, try transitioning back to idling and vice-versa while
juggling.
Mountain Ultimate Wheeling
What do you call it? MULTing or MUWing or Mountain UWing? (Well, it
looked a little harder on the wheel.)
Climbing up a hill: Here you need to
tilt the wheel 30 degrees or so away the leg pushing down. At the
same time you need to also be rythmically throwing your weight on
each leg as it pushes down, to get that extra torque.
Going down a hill: Here friction is
your friend. Lean back a little and squeeze the wheel with your
legs if you go too fast. Squeezing the wheel also helps when you go
off logs and drops.
Rolling over logs (and big twigs :)):
Make sure you hit the log at the sweet spot where your leading
pedal is just a bit higher than the back pedal.
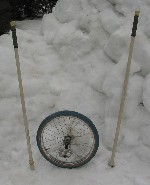
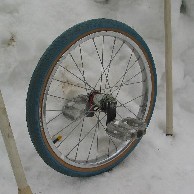
Riding in the snow: The best is a
good downhill and stopping short (pedals horizontal) so the tire
skids. Its made for the snow.... and you get less leg/tire
friction.
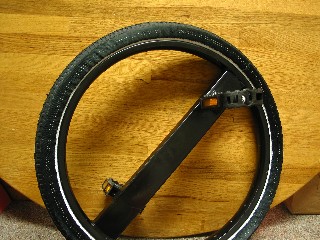
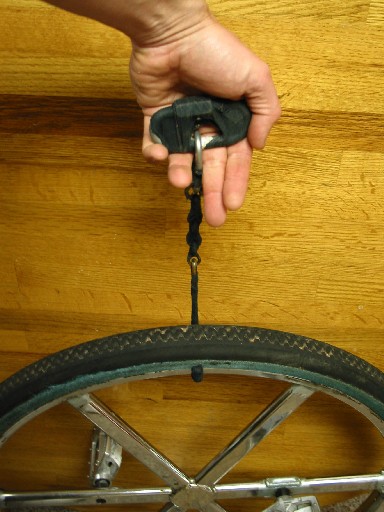
Hopping: I was not willing to risk
pulling out my back trying to make high hops with the UW. Instead,
I made a hook on a chain, with plenty of tape on it to keep it from
twisting up, or damaging myself or the UW. I find its best to have
the leading pedal facing the obstacle and come to a circus idle,
hook the hook in with the opposite hand of the side with the
leading pedal, make a few practice hops to make sure the hook feels
comfortable and is centered. Hop up, circus idle again and release
the hook, and ride off. I used the hook on my 26". It has a similar
feel to seat out hops, perhaps a bit more stable and less awkward
then holding the seat on a unicycle. Usable hook length 254mm or
10" (a bit longer may be better especially on smaller UWs).
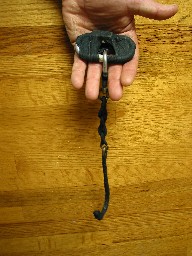 UW hook
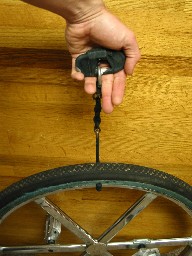 UW hook and 26" UW
Lunicycle
I got my Lunicycle here.
Lunicyle site
I had trouble doing a still stand or going up hill on it as my feet
kept sliding off. I did this one minor fix... drilled some holes and put
in screws (shaving of the pointy part with a grinder). (This voids any
warranty!)
 Lunicycle with pins
 Left pedal with pins
 Left pedal upsidedown
I think it turned out well. Leg kind of hurts after a 10 minute ride but
having fun with it.
Can free mount, ride backwards and get close to touching ground.
Also neat to ride with right foot on left pedal as it feels very bumpy.
Also second setting for "crank size" is nice for longer distance. You
hardly have to pedal at all.
Seat Dragging
Once you have the control to go backwards on the UW, you are
probably ready to move on to seat dragging on the unicycle. I think
it may be easier to learn on a bigger wheel so your feet are not
pushed off so easily when the wheel twists at a sharp angle. I am
learning on a 26" wheel with mountain bike pedals and protection
for seat. The feeling of learning how to ride all over again when
first on the ultimate wheel, comes back to get you here. One finds
that the few inches for cranks to clear spokes makes a big
difference when trying to ride a unicycle this way. I find seat
dragging with the seat behind you is a lot easier then in front
especially on bumpy ground. I've gone a 1/4 mile with the seat
behind me. The real trick is picking up the seat, which I have not
done yet.
Impossible Wheel (BC Wheel)
This is where the pedals hang an inch or so from the axle and do
not drive the wheel. The pedals are not independent i.e. if you
lift one the other lifts up as well. I started learning with a
fence on one side and a pole on the other. I found this easier and
more stable than using just 2 poles. Its also kind of scary at
first. It may be a good idea to where a helmet, since it may get
ahead of you and you may fall backwards easily. Currently, I use 2
poles and have free-wheeled about 5 meters or so, then with 2 poles
gently tap the ground again and roll onward. It helps to have leg
armor, so if you have to brake by turning the wheel sideways it
does not take some skin.

The Unicycle Factory (Tom
Miller). Mine
was made by Tom. Poles courtesy of Scott Bridgman.
Other Ultimate Wheel Links
Thanks to Ravenwood
Photographic for the riderless (non-web) ultimate wheel shots
(12 Nov 02).
Send comments/suggestions to:
David Bagley's
mail
Last Revised: 5 December 2021

 Hands off mount. (With Scott the Muniac and James Muehlner looking
on.)
Hands off mount. (With Scott the Muniac and James Muehlner looking
on.) On
the road (Scott's Aluminum Muni and my thick spoke UW leaning
against car)
On
the road (Scott's Aluminum Muni and my thick spoke UW leaning
against car)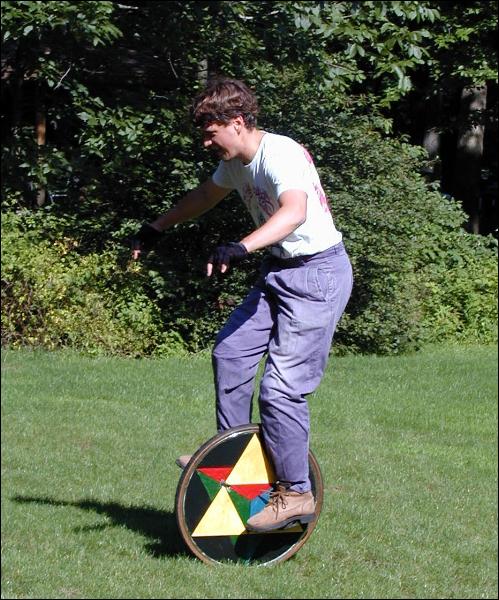 Very mild off road terrain.
 Brian MacKenzie's 36"
Coker
Brian MacKenzie's 36"
Coker Ultamet wheel (tm) just out of box
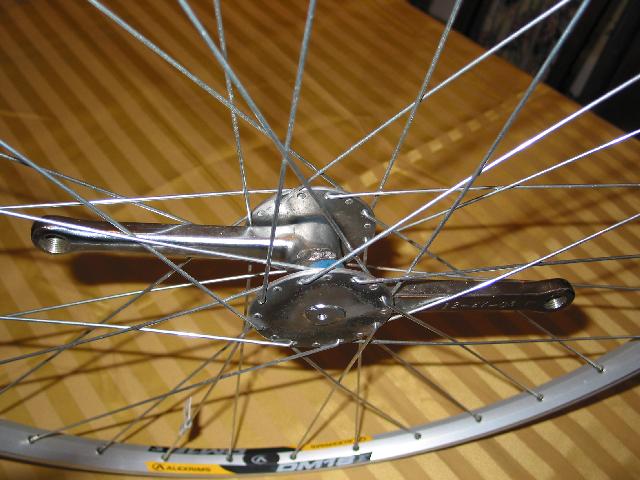 Ultamet wheel (tm)
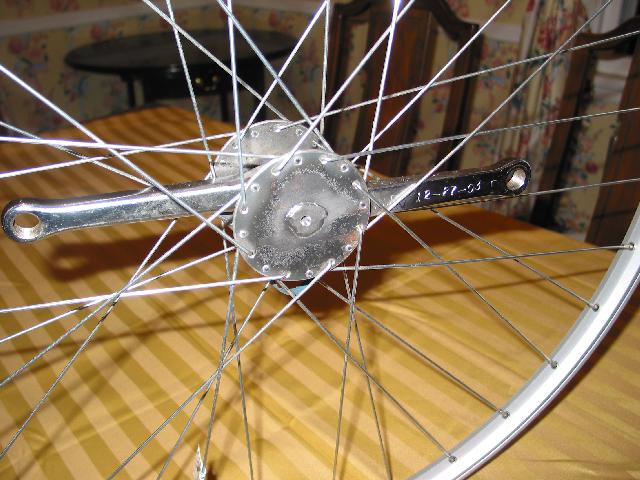 Ultamet wheel (tm) TUF birth
mark
Ultamet wheel (tm) TUF birth
mark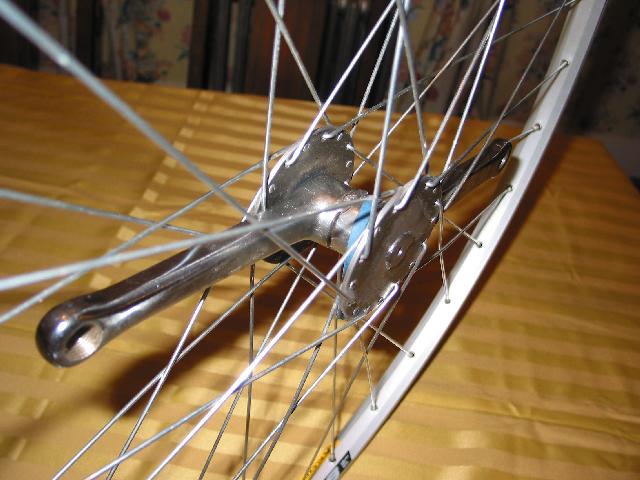 Ultamet wheel (tm) side view
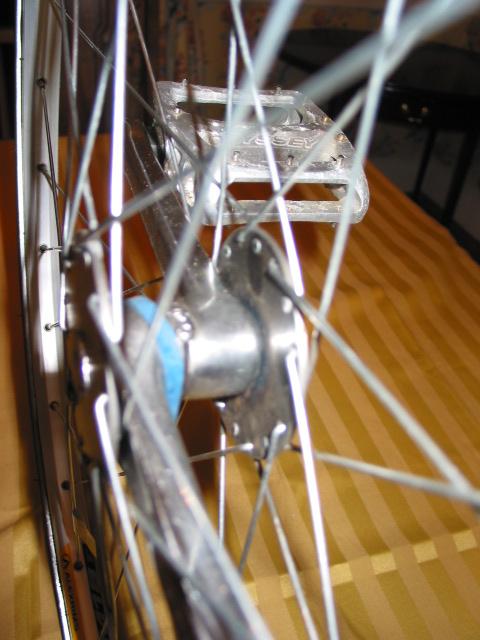 Ultamet wheel (tm)
inside
Ultamet wheel (tm)
inside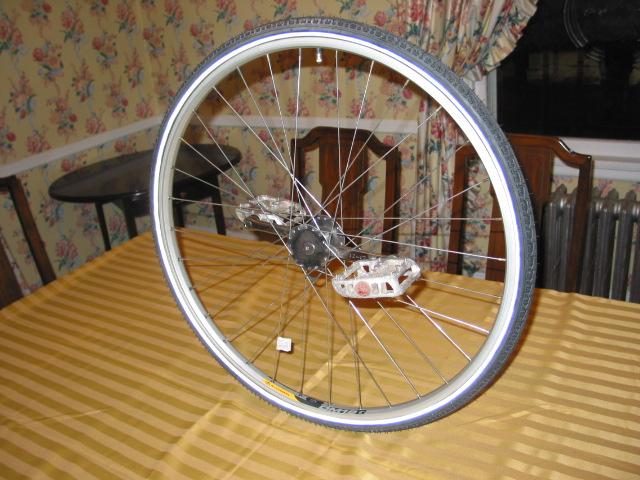 Ultamet wheel (tm) balanced
 dry rot white wall with new
tire, UW now has hand hold holes
dry rot white wall with new
tire, UW now has hand hold holes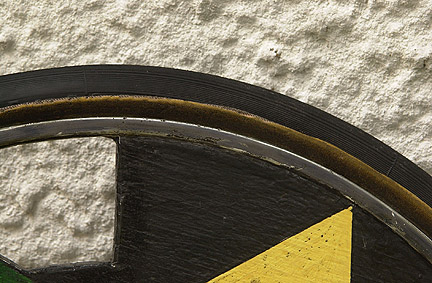 close-up
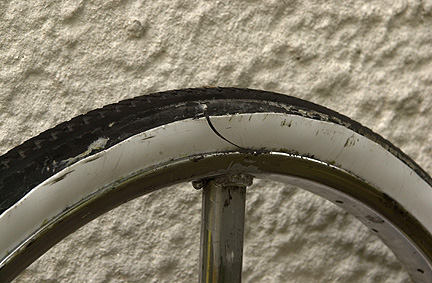 result of going off a 2 cm curb
 9/16" webbing sewn to white wall
 webbing sewn to white wall and
Roach pads
webbing sewn to white wall and
Roach pads  26" and roach pad
 24" with 1" webbing
  24" close-up
 20" with 1" webbing
 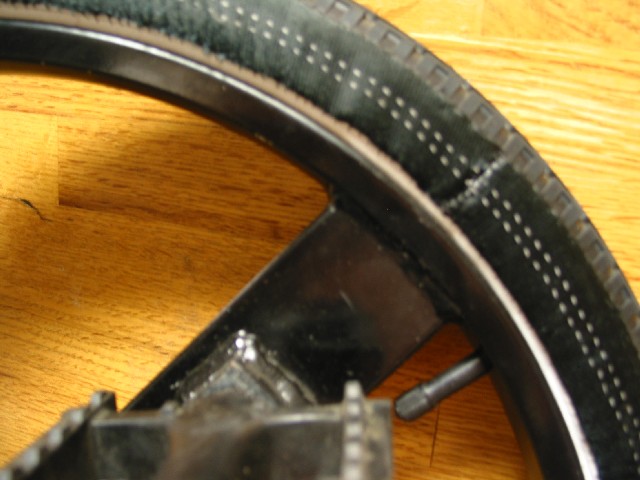 20" close up
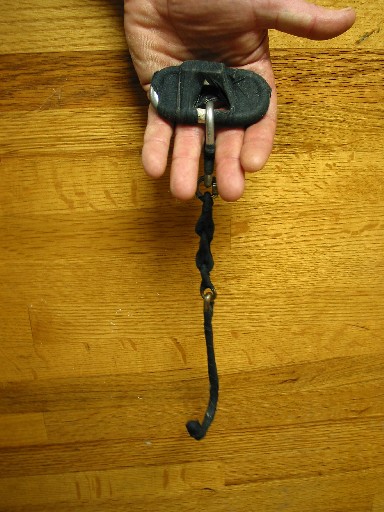 UW hook
 UW hook and 26" UW
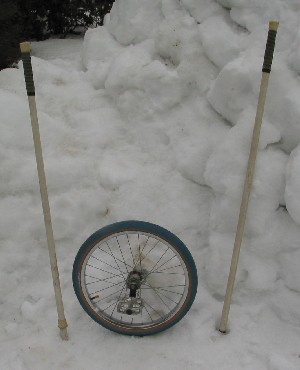